Google Fonts is a library of over 1,500 open source font families and APIs for convenient use via CSS and Android.
Embedding Google Fonts in your website via the Google Fonts Web API or Google's server is a popular way to add custom fonts to a WordPress website.
However, Google's server requires the user's IP address and the user agent to serve the font files, as described in the Google Fonts privacy policy. In January 2022 the German Court declared that Google Fonts is not GDPR/DSGVO compliant.
To comply with the GDPR law, you must self-host Google Fonts on your WordPress website.
Don't worry! It's easy to do with Yabe Webfont. Just a few clicks, and you're done.
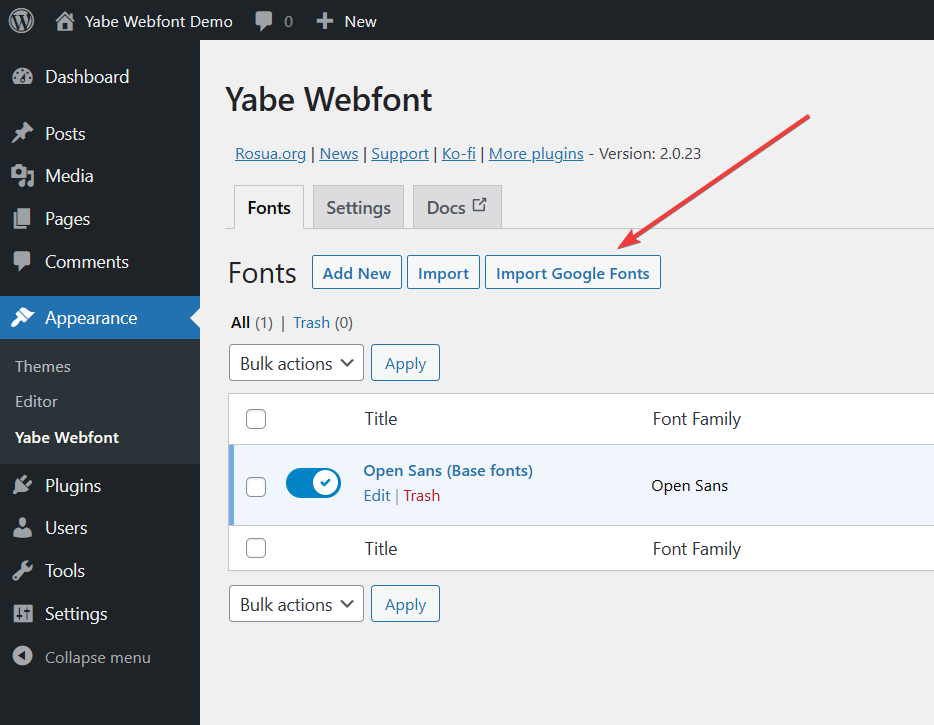
Step 1: Add new font
Go to Appearance → Yabe Webfont and click the Import Google Fonts button.
Step 2: Search the font family
Find the font family you want to add from the list or start typing to search.

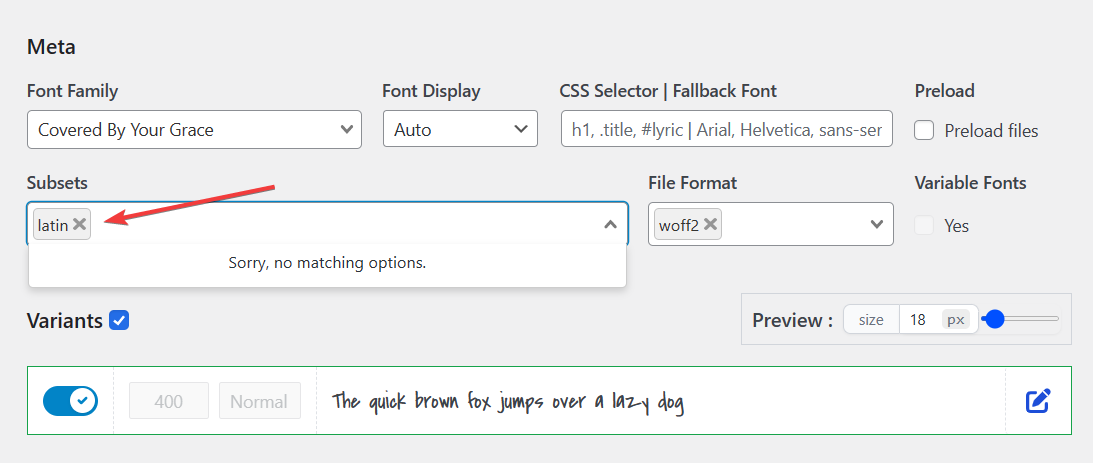
Step 3: Selecting font subsets
Subset is a file that contains a custom (and usually limited) collection of glyphs. Learn more about subsetting.
Some fonts have multiple subsets; you can select the ones you want to use.
Step 4: More file formats
You can select multiple file formats to support more browsers.
Available file formats:
WOFF(Web Open Font Format): a compressed file format created specifically for web fonts.WOFF2(Web Open Font Format 2): a successor to WOFF, it offers better compression than WOFF and supports variable fonts.TTF(TrueType Font): an uncompressed font file format for desktop use.
The recommended font format is WOFF2.
TTF font file (for example, downloaded from Google Fonts), you can convert it to WOFF2 right in your browser using our TTF to WOFF2 Converter. No upload, fully private — the conversion runs locally via WebAssembly.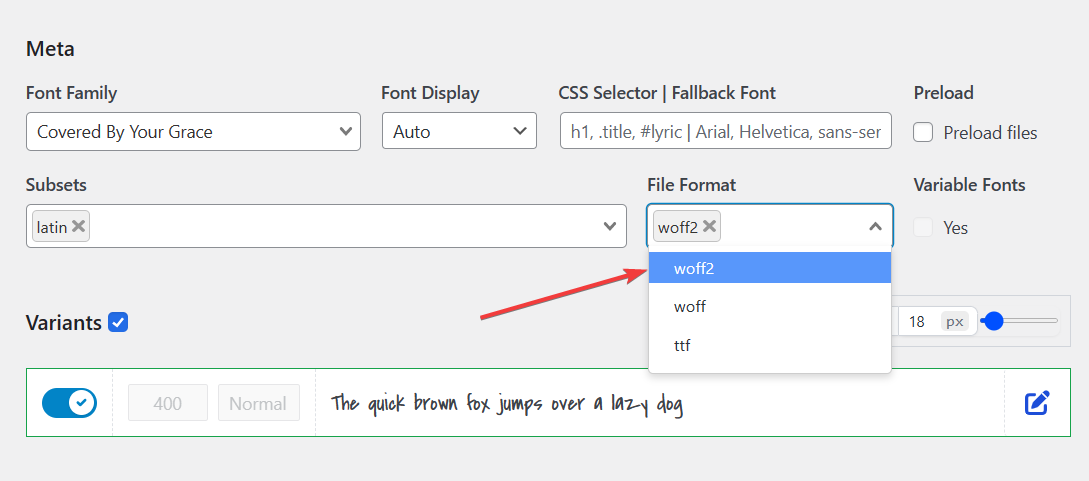
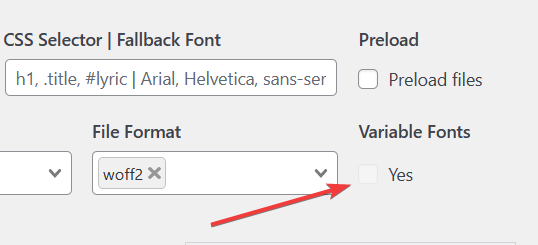
Step 5: Using variable fonts (optional)
The variable fonts format enables a font file to hold various stylistic variations.
If the font family has the variable fonts format, you can use it by ticking the Variable Fonts checkbox.
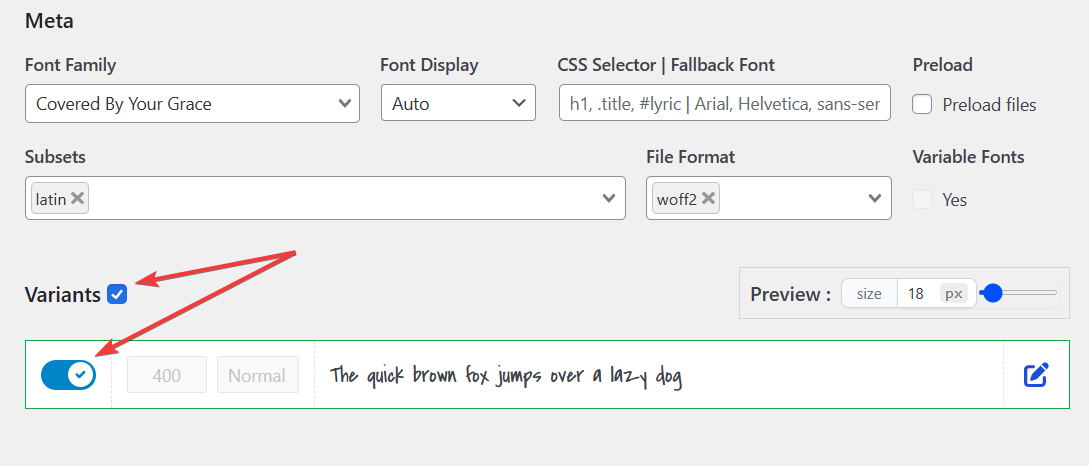
Step 6: Choose font variants
You can enable/disable the font variants you want to use. Or you can allow all variants by ticking the Variants checkbox.
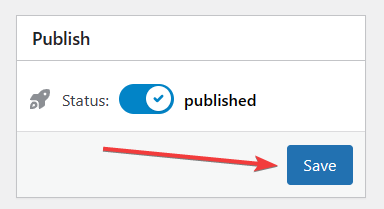
Step 7: Publish the font
Ensure the Status toggle is set to Published, and click the Save button.